About a month ago I made an announcement about the initial release of shinyjs. After some feedback, a few feature requests, and numerous hours of work, I’m excited to say that a new version of shinyjs v0.0.6.2 was made available on CRAN this week. The package’s main objective is to make shiny app development better and easier by allowing you to perform many useful functions with simple R code that would normally require JavaScript coding. Some of the features include hiding/showing elements, enabling/disabling inputs, resetting an input to its original value, and many others.
Important note
The package has improved a lot since writing this post. I highly recommend you stop reading this page and instead go the shinyjs website.
Table of contents
- Availability
- Quick overview of new features
- Major new features
- Major improvements
- Extra features on GitHub but not yet on CRAN
- Feedback + suggestions
Availability
shinyjs is available through both CRAN
(install.packages("shinyjs")) and GitHub
(devtools::install_github("daattali/shinyjs")). Use the GitHub version to get the latest version with the newest features.
Quick overview of new features
This post will only discuss new features in shinyjs. You can find out more about the package in the initial post or in the package README on GitHub. Remember that in order to use any function, you need to add a call to useShinyjs() in the shiny app’s UI.
Two major new features:
resetfunction allows inputs to be reset to their original valueextendShinyjsallows you to add your own JavaScript functions and easily call them from R as regular R code
Two major improvements:
- Enabling and disabling of input widgets now works on all types of shiny inputs (many people asked how to disable a slider/select input/date range/etc, and
shinyjsnow handles all of them) - The
togglefunctions gained an additionalconditionargument, which can be used to show/hide or enable/disable an element based on a condition. For example, instead of writing code such asif (test) enable(id) else disable(id), you can simply writetoggleState(id, test)
Three new features available on the GitHub version but not yet on CRAN:
hidden(used to initialize a shiny tag as hidden) can now accept any number of tags or a tagList rather than just a single taghide/show/togglecan be run on any JQuery selector, not only on a single ID, so that you can hide multiple elements simultaneouslyhide/show/togglehave a new arugmentdelaywhich can be used to perform the action later rather than immediately. This can be useful if you want to show a message and have it disappear after a few seconds
Two major new features
There were two major features that I wanted to include in the CRAN release.
reset - allows inputs to be reset to their original value
Being able to reset the value of an input has been a frequently asked question on StackOverflow and the shiny Google Group, but a general solution was never available. Now with shinyjs it’s possible and very easy: if you have an input with id name and you want to reset it to its original value, simply call reset("name"). It doesn’t matter what type of input it is - reset works with all shiny inputs.
The reset function only takes one arugment, an HTML id, and resets all inputs inside of that element. This makes reset very flexible because you can either give it a single input widget to reset, or a form that contains many inputs and reset them all. Note that reset can only work on inputs that are generated from the app’s ui and it will not work for inputs generated dynamically using uiOutput/renderUI.
Here is a simple demo of reset in action

extendShinyjs - allows you to easily call your own JavaScript functions from R
The main idea behind shinyjs when I started working on it was to make it extremely easy to call JavaScript functions that I used commonly from R. Now whenever I want to add a new function to shinyjs (such as the reset function), all I have to do is write the JavaScript function, and the integration between shiny and JavaScript happens seamlessly thanks to shinyjs. My main goal after the initial release was to also allow anyone else to use the same smooth R –> JS workflow, so that anyone can add a JavaScript function and call it from R easily. With the extendShinyjs function, that is now possible.
Very simple example
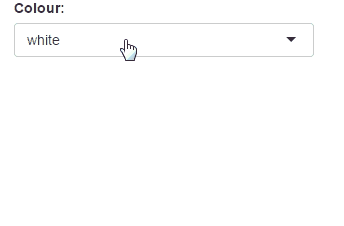
Using extendShinyjs is very simple and makes defining and calling JavaScript functions painless. Here is a very basic example of using extendShinyjs to define a (fairly useless) function that changes the colour of the page.
library(shiny)
library(shinyjs)

jsCode <- "shinyjs.pageCol = function(params){$('body').css('background', params);}"

runApp(shinyApp(
  ui = fluidPage(
    useShinyjs(),
    extendShinyjs(text = jsCode),
    selectInput("col", "Colour:",
                c("white", "yellow", "red", "blue", "purple"))
  ),
  server = function(input,output,session) {
    observeEvent(input$col, {
      js$pageCol(input$col)
    })
  }
))
Running the code above produces this shiny app:
See how easy that was? All I had to do was make the JavaScript function shinyjs.pageCol, pass the JavaScript code as an argument to extendShinyjs, and then I can call js$pageCol(). That’s the basic idea: any JavaScript function named shinyjs.foo will be available to call as js$foo(). You can either pass the JS code as a string to the text argument, or place the JS code in a separate JavaScript file and use the script argument to specify where the code can be found. Using a separate file is generally prefered over writing the code inline, but in these examples I will use the text argument to keep it simple.
Note: in order to use extendShinyjs, you must have the V8 package installed. You can install it with install.packages("V8").
Passing arguments from R to JavaScript
Any shinyjs function that is called will pass a single array-like parameter to its corresponding JavaScript function. If the function in R was called with unnamed arguments, then it will pass an Array of the arguments; if the R arguments are named then it will pass an Object with key-value pairs. For example, calling js$foo("bar", 5) in R will call shinyjs.foo(["bar", 5]) in JS, while calling js$foo(num = 5, id = "bar") in R will call shinyjs.foo({num : 5, id : "bar"}) in JS. This means the shinyjs.foo function needs to be able to deal with both types of parameters.
To assist in normalizing the parameters, shinyjs provides a shinyjs.getParams() function which serves two purposes. First of all, it ensures that all arguments are named (even if the R function was called without names). Secondly, it allows you to define default values for arguments. Here is an example of a JS function that changes the background colour of an element and uses shinyjs.getParams().
shinyjs.backgroundCol = function(params) {
  var defaultParams = {
    id : null,
    col : "red"
  };
  params = shinyjs.getParams(params, defaultParams);

  var el = $("#" + params.id);
  el.css("background-color", params.col);
}
Note the defaultParams that we defined and the call to shinyjs.getParams. It ensures that calling js$backgroundCol("test", "blue") and js$backgroundCol(id = "test", col = "blue") and js$backgroundCol(col = "blue", id = "test") are all equivalent, and that if the colour parameter is not provided then “red” will be the default. All the functions provided in shinyjs make use of shinyjs.getParams, and it is highly recommended to always use it in your functions as well. Notice that the order of the arguments in defaultParams in the JavaScript function matches the order of the arguments when calling the function in R with unnamed arguments. This means that js$backgroundCol("blue", "test") will not work because the arguments are unnamed and the JS function expects the id to come before the colour.
For completeness, here is the code for a shiny app that uses the above function (it’s not a very practical example, but it’s great for showing how to use extendShinyjs with parameters):
library(shiny)
library(shinyjs)

jsCode <- '
shinyjs.backgroundCol = function(params) {
  var defaultParams = {
    id : null,
    col : "red"
  };
  params = shinyjs.getParams(params, defaultParams);

  var el = $("#" + params.id);
  el.css("background-color", params.col);
}'

runApp(shinyApp(
  ui = fluidPage(
    useShinyjs(),
    extendShinyjs(text = jsCode),
    p(id = "name", "My name is Dean"),
    p(id = "sport", "I like soccer"),
    selectInput("col", "Colour:",
                c("white", "yellow", "red", "blue", "purple")),
    textInput("selector", "Element", ""),
    actionButton("btn", "Go")
  ),
  server = function(input,output,session) {
    observeEvent(input$btn, {
      js$backgroundCol(input$selector, input$col)
    })
  }
))
And the resulting app:

Note that I chose to define the JS code as a string for illustration purposes, but in reality I would prefer to place the code in a separate file and use the script argument instead of text.
Two major improvements
Among the many small improvements made, there are two that will be the most useful.
Enabling/disabling works on all inputs
The initial release of shinyjs had a disable/enable function which worked on the major input types that I was commonly using, but not all. Several people noticed that various inputs could not be disabled, so I made sure to fix all of them in the next version. The reasons behind why not all inputs were easy to disable are very technical so I won’t go into them. Now calling disable(id) or enable(id) will work on any type of shiny input.
Use a condition in toggle functions
I’ve noticed that some users of shinyjs had to often write code such as if (test) enable(id) else disable(id). This seemed inefficient and verbose, especially since there was already a toggleState function that enables disabled elements and vice versa. The toggleState function now has a new condition parameter to address exactly this problem. The code above can now be rewritten as toggleState(id, test).
Similarly, code that previously used if (test) show(id) else hide(id) can now use toggle(id = id, condition = test), and code that was doing a similar thing with addClass/removeClass can use the toggleClass(id, class, condition) function.
Three new features available on the GitHub version but not yet on CRAN
Since submitting shinyjs to CRAN, there were a few more features added. They will go into the next CRAN submission in about a month, but for now they can be used if you download the GitHub version.
hidden now accepts multiple tags
The hidden function is the only shinyjs function that’s used in the UI rather than in the server. It’s used to initialize a tag as hidden, and you can later reveal it using show(tag). The initial release only allows single tags to be given to hidden, but now it can accept any number of tags or a tagList. For example, you can now add a button and some text to the UI and have them both hidden with this code: hidden(actionButton("btn", "Button"), p(id = "text", "text")). You can then call show("btn") or show("text") to unhide them.
Visibility functions can be run on any selector
Previously, the only way to tell the hide, show, and toggle functions what element to act on was to give them an ID. That becomes very limiting when you want to hide or show elements in batch, or even if you just want to show/hide an element without an ID. The visibility functions now have a new optional parameter selector that accepts any CSS-style selector. For example, to hide all hyperlinks on a page that have the class “hide-me-later” you can now call hide(selector = "a.hide-me-later"). This makes the visibility functions much more powerful.
Visibility functions can be delayed
In a shiny app that I’m currently developing for my graduate work there are many different “Update” buttons that the user can click on. After an update is successful, I wanted to show a “Done!” message that would disappear after a few seconds. Using shinyjs I was already able to show the message when I wanted to, but I needed an easy way to make it disappear later. So I added the delay parameter to show/hide/toggle, that tells the function to only act in x seconds instead of immediately. Now if I want to show a message and hide it after 5 seconds, I can call show("doneMsg"); hide(id = "doneMsg", delay = 5). It’s not a big deal, but it can be handy.
Feedback + suggestions
If you have any feedback on shinyjs, I’d love to hear about it! I really do hope that it’s as easy to use as possible and that many of you will find it useful. If you have any suggestions, please do open a GitHub issue or let me know in any other way.