Setting up a GitHub Pages site with a custom domain name is relatively simple and has lots of documentation. On the other hand, setting up two (or more) GitHub Pages sites within the same GitHub account has no documentation and can be confusing. But it’s actually very simple, as this step-by-step guide will show you.
Table of contents
Background
GitHub Pages is a great way to host a static website for free–any GitHub repository you create can have a corresponding website with a special URL.
Suppose your GitHub user name is “daattali”. If you create a repository with the special name “daattali.github.io”, then GitHub Pages will generate your website for that repository at http://daattali.github.io. That’s called a User Site, because any GitHub user can have one such repository with their username. Any other repository you create, for example “MyCoolProject”, will be available at http://daattali.github.io/MyCoolProject. These are called Project Sites because any project (repository) you create can have a website with this URL.
If you want to use your own custom URL, you can purchase a domain name (I use Namecheap and pay about $10/year) and follow GitHub’s documentation on connecting your custom domain to your GitHub Pages website.
The Problem
Since 2015, I’ve hosted my personal website in the GitHub repository “daattali.github.io”, which means the URL for my website is https://daattali.github.io. I’ve purchased the domain name “deanattali.com” from Namecheap and connected it to my repository, so now my website is also accessible from https://deanattali.com. This is my User Site.
I also have several projects in GitHub that have their own GitHub Pages websites. For example, my project shinyjs has a Project Site, and according to the GitHub Pages URL rules it’s accessible from daattali.github.io/shinyjs. Since I have a custom domain for “daattali.github.io”, then the shinyjs website is also available at deanattali.com/shinyjs. Similarly, any other GitHub repository that I create will have its Project Site at deanattali.com/<project name>.
So far, so good.
Last month, I decided to move my consulting website, attalitech.com, to use GitHub Pages. So I created a repository called “attalitech”, built the website (using my theme Beautiful Jekyll), and now I had it hosted for free at deanattali.com/attalitech. This works, but that’s not a very professional URL! I already bought the URL “attalitech.com”, and I wanted that URL to be used for my new GitHub Project Site of the “attalitech” repository.
My problem was that I couldn’t find any documentation on how to do that. There’s ample documentation on how to set up either a User Site or a Project Site with a custom URL, but no information about having both together. I still wanted all my other repositories to be deanattali.com/<projectname>, but for this particular repository I wanted to have a different URL. I did find some other people who asked about this, but there was never any clear answer given, and some people even said it can’t be done. One thing that makes it particularly annoying to troubleshoot is that whenever you’re dealing with URL/DNS settings, it can take a few hours for changes to take effect. This is why I decided to write this post, to save time for the next person.
You might notice that all my GitHub websites have a similar look (deanattali.com, attalitech.com, beautifuljekyll.com, shinyjs). If you want to build a similar GitHub Pages site then you can use my theme Beautiful Jekyll.
The Solution
This might sound trivial, but the solution to setting up a User Site and a Project Site with different domains is actually very simple: you repeat the exact same steps for both. I know this sounds crazy simple, but Step 4 below is mostly what confused me (and other people on the internet who asked the same question and weren’t given an answer).
I’m using Namecheap, but the same steps could be applied with any other registrar. The following steps assume that you:
- Already have a User Site with a custom domain set up (in my case, that’s “daattali.github.io”)
- Purchased another domain (in this example, I’ll use “mycoolproject.com”)
- Have a GitHub repository that you want to attach the new domain to (in this example, I’ll use “MyCoolProject”)
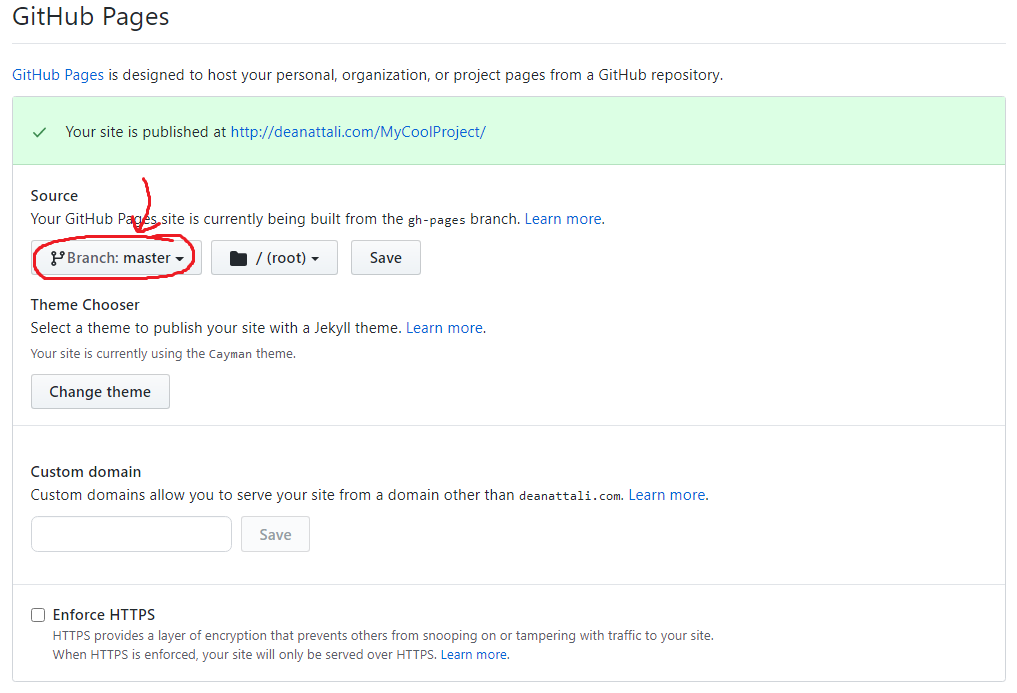
Step 1: Enable GitHub Pages
On GitHub, go to the Settings page of your new repository, scroll down to the GitHub Pages section, and enable it by selecting a Source. After you refresh the page, you should see a green success banner that tells you this repository is now published at http://deanattali.com/MyCoolProject.
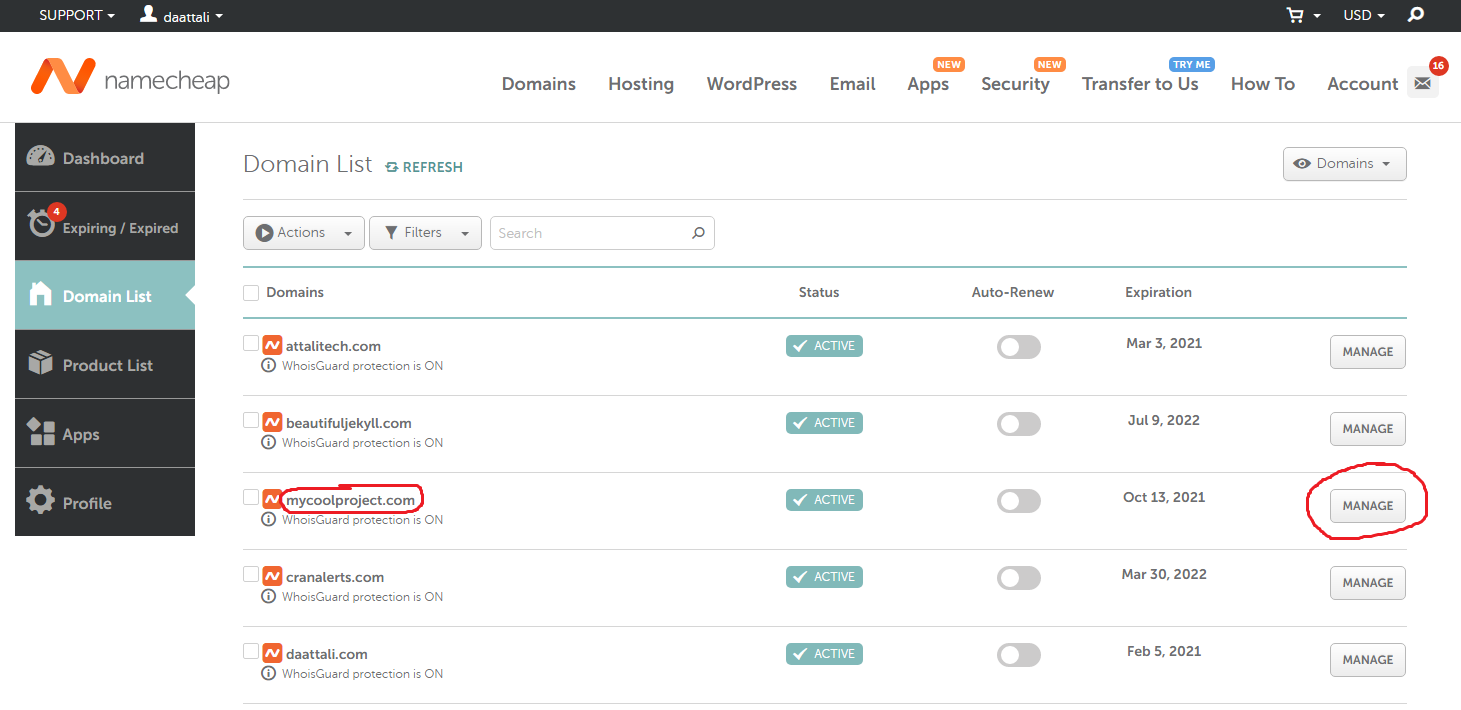
Step 2: Navigate to domain settings
Log into Namecheap and find the page that lists all your domains (the page that looks like the screenshot below). Click on the Manage button beside the row that corresponds to the domain you want to use.
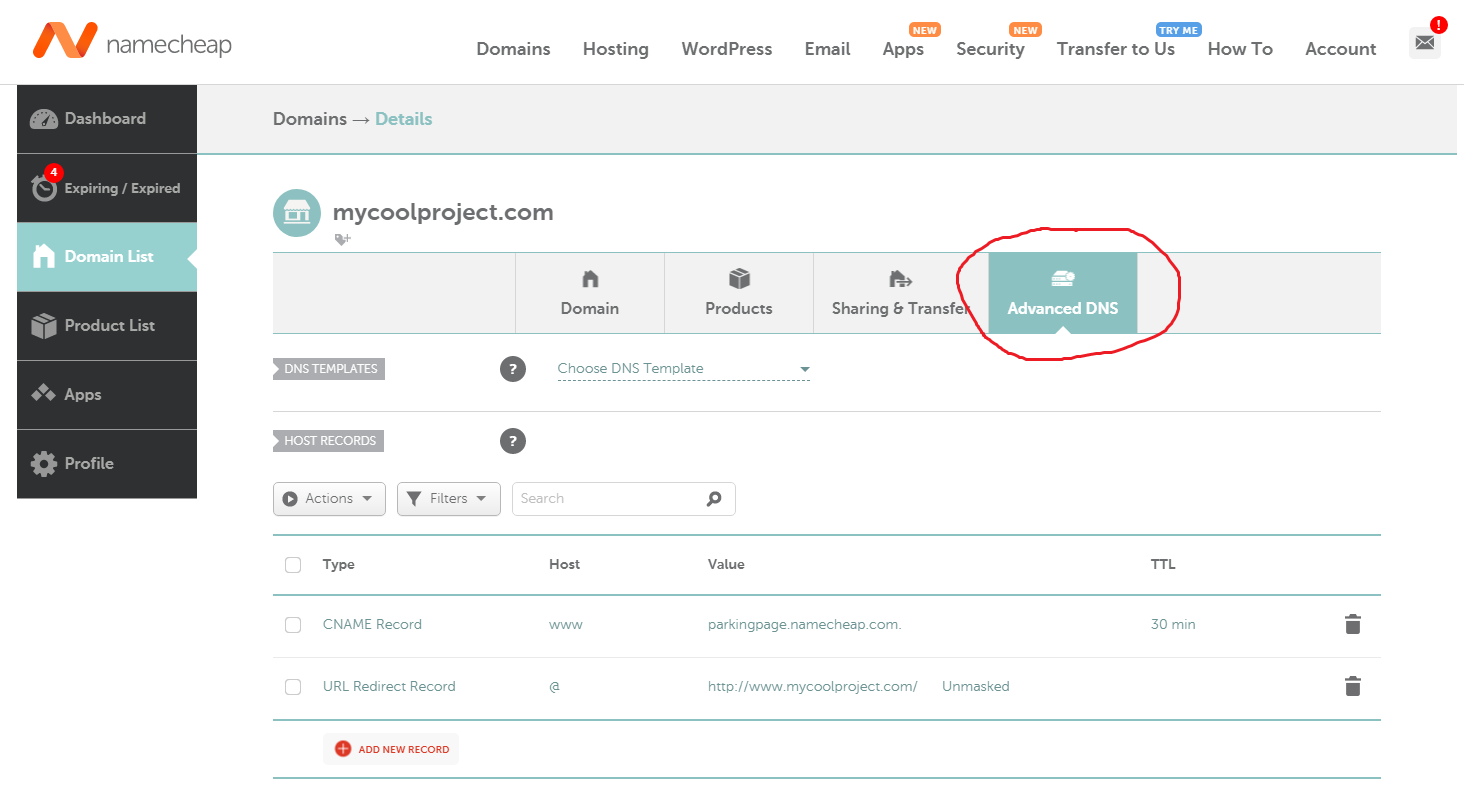
Step 3: Open DNS settings
Once you’re on the settings page for the domain, go to the Advanced DNS tab, where you’ll be able to change DNS settings. DNS stands for “domain name system” and, as a huge oversimplification, that’s what ties your website to a specific URL.
Step 4: Set the DNS records
Under the Host Records section, you’ll see a few rows pre-filled. Delete whatever records are already there, and add the following 5 records:
- “A Record” with host “@” and value “185.199.108.153”
- “A Record” with host “@” and value “185.199.109.153”
- “A Record” with host “@” and value “185.199.110.153”
- “A Record” with host “@” and value “185.199.111.153”
- “CNAME Record” with host “www” and value “daattali.github.io.”
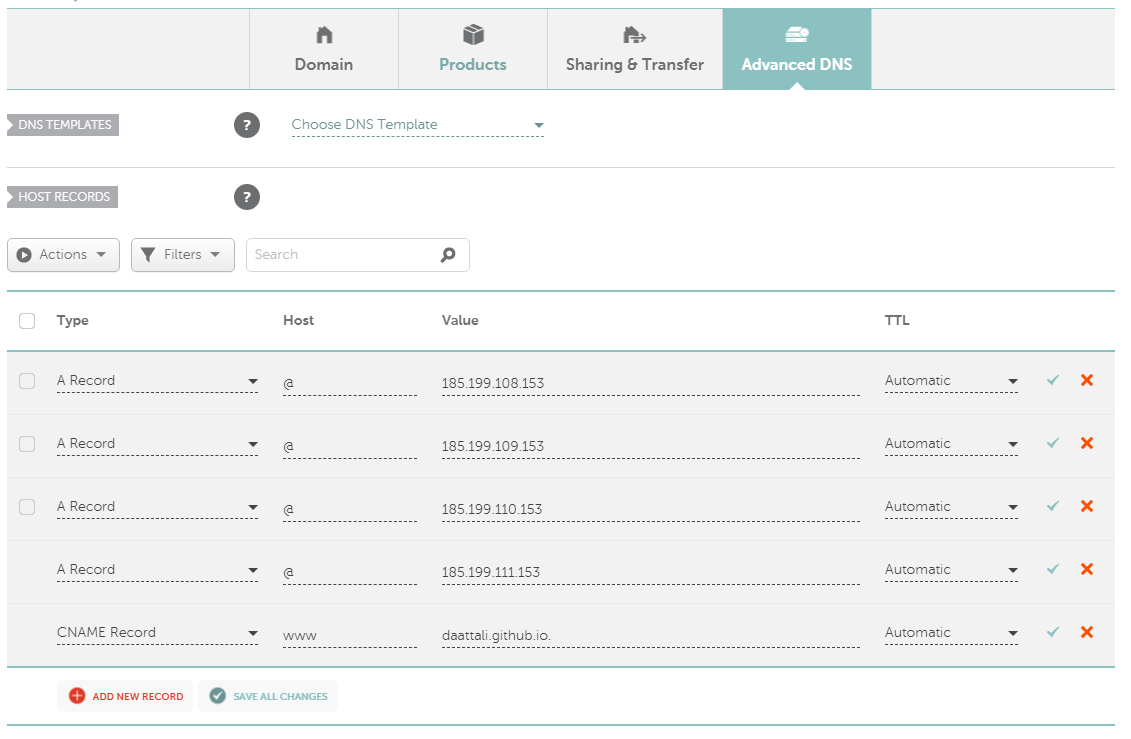
Very Important Notes
- Make sure to click the green checkmarks to save the new records, and refresh the page to make sure all 5 records were saved
- The CNAME record should use your username instead of “daattali”
- Notice that there’s a dot at the end of the CNAME record
- Most importantly, and this is what confused me: you may notice that these are the exact same DNS records that were used with your User Site. This was confusing to me because I expected the CNAME to be something like “daattali.github.io./MyCoolProject”, but that’s wrong!
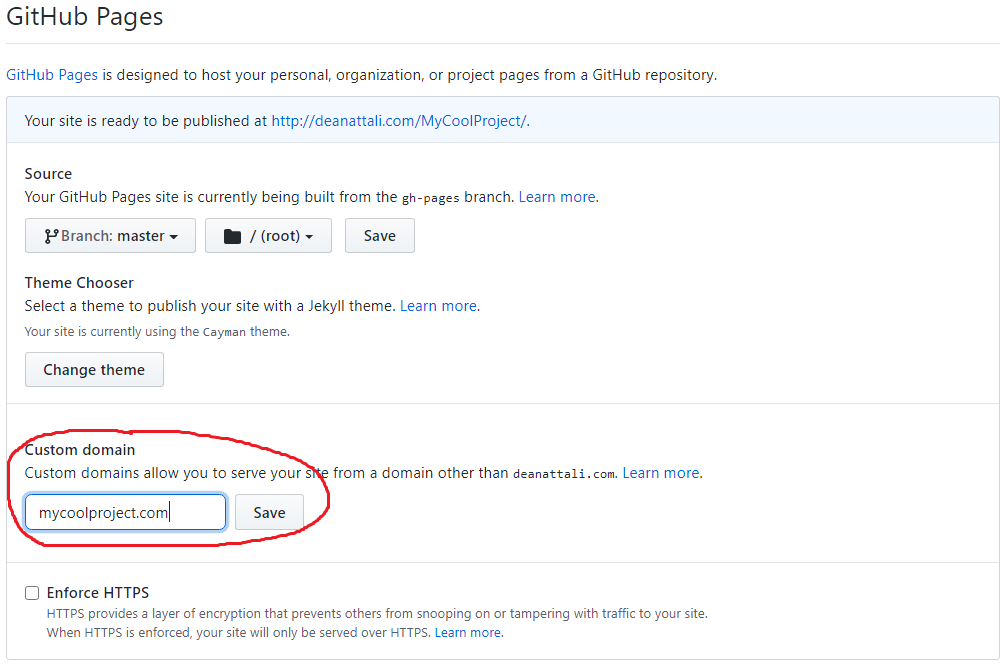
Step 5: Tell GitHub about the domain
After setting the DNS records in Namecheap, it’s now time to notify GitHub about the URL. Go back to the GitHub Pages section of your repository’s settings, and under Custom Domain enter your domain. Don’t forget to press the Save button!
Step 6: Wait
Go for a walk, or have a Zoom date if you’re in COVID lockdown.
The banner showing the website URL at the top of the GitHub Pages section should now show the new domain, but it might take a few hours for these changes to take effect. Don’t panic if your new URL doesn’t work right away, it really can take a few hours!

Step 7: Enable HTTPS
Once your new domain is working, the last step is to make sure your website is served securely over HTTPS instead of HTTP, so just tick the “Enforce HTTPS” box.

Refresh the page, and the URL should show “https”. You’re all set!
