Since this site went live a few days ago, I had many people ask me how I made it. Like a great politician, I will avoid that question almost entirely with a completely different answer: The core template that runs this website is available for anyone to use. I called it Beautiful Jekyll.
Basically, since I’m kind of OCD about making everything generalised and reusable, after spending a few hours building my website I decided to instead build a reusable template to easily make similar websites. This of course meant that I spent infinitely longer on making my site because I wanted the template to be very simple for others to understand and extend. Some would argue it was a waste of time, but it was fun :) Since the engine behind the site is called Jekyll, and in my completely unbiased opinion this theme is beautiful, I chose the name that I did.
You can view a demo of the template and use it right away if you want. Please do, it’ll make me feel important :)
UPDATE December 2016: Thank you everybody for making me feel important! I initially thought that 3 people using my theme would be considered success, but it’s been used by well over 1000 people already. Apparently this wasn’t a waste of time!
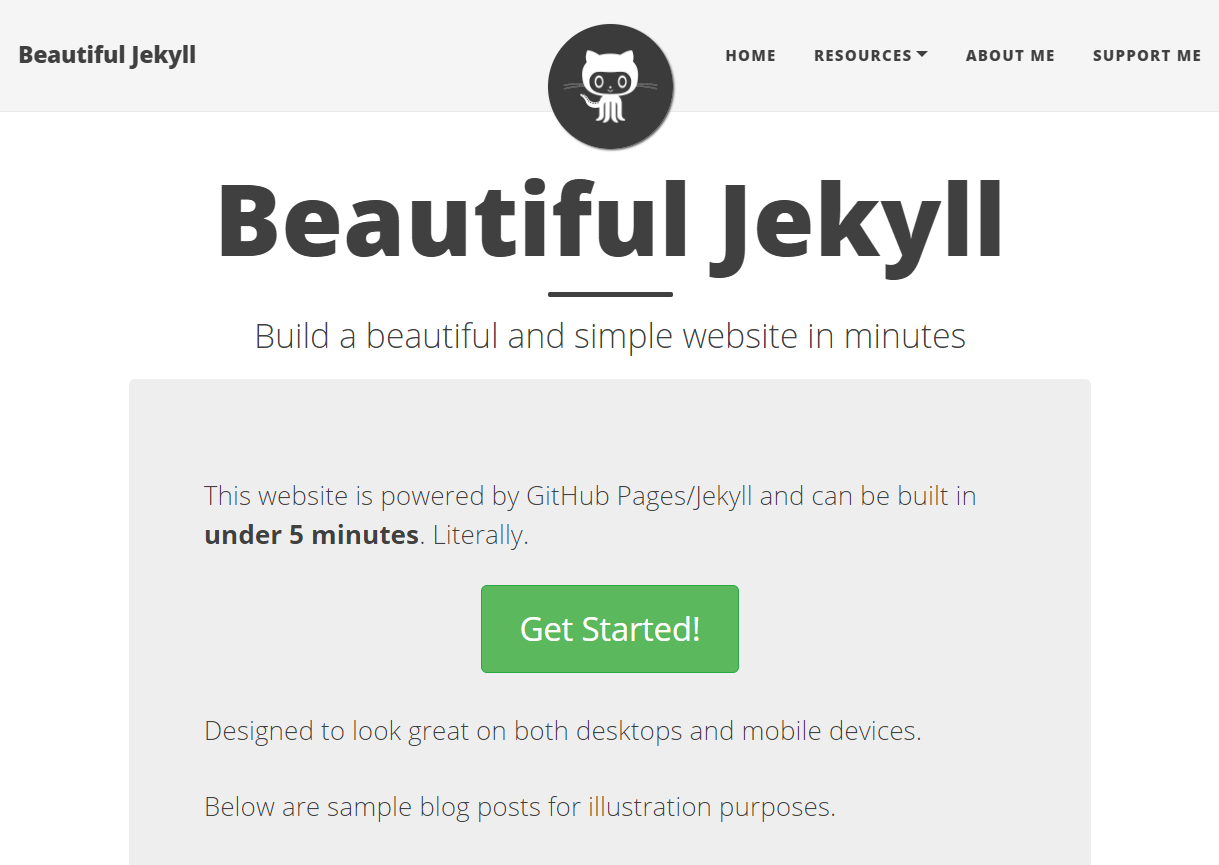
This is what your site will look like right off the bat:

Beautiful Jekyll is meant to be very easy and quick to use - you can make a nice simple site that supports blogging and looks great on any device (phones/laptops) within minutes. Look at the demo - it might just be the best link you clicked on today. Or at least in the last 20 seconds.
Technical notes about this site
This site is hosted by GitHub Pages, which provides free hosting. It also means that the code for the site is public and can be viewed as a git repo (link). I’ve wanted a website for a long time but never wanted to pay ridiculous monthly hosting fees, so this was perfect for me.
GitHub Pages uses Jekyll, which is a simple static-page website generator that focuses on blogging. Being a static site generator means that the pages are built just once and just being served when their URL is hit, rather than being dynamically created with every page load. For my purposes this was definitely enough.
Custom domain name (instead of https://daattali.github.io)
In order to have a nice domain name, I bought a domain from Namecheap, mainly because it was the most affordable legitimate domain name registrar I could find. Buying the domain meant that I can reach my site via https://deanattali.com instead of https://daattali.github.io (though they both work and are identical).
Set up custom domain name with GitHub Pages
After purchasing my domain name (deanattali.com) from Namecheap, there were a few simple settings to set to get deanattali.com to render my GitHub page.
- In the git repository, I added a file named
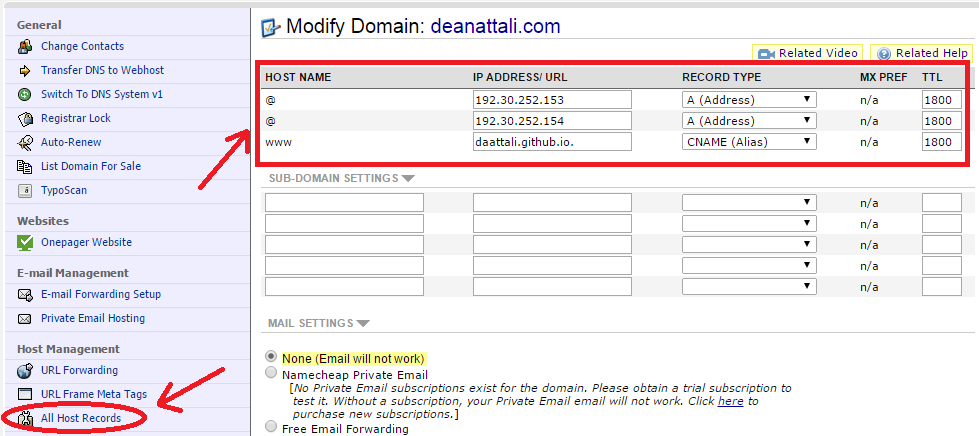
CNAMEthat contained my domain. (Here is my CNAME) - I logged into Namecheap and changed the following settings under “All Host Records”
- Set the “@” IP Address/URL to
192.30.252.153and the Record Type toA (Address) - Set the “www” IP Address/URL to
daattali.github.io.and the Record Type toCNAME (Alias) - Add a subdomain entry:
@as the Host Name,192.30.252.154as the IP Address/URL, andA (Address)as the Record Type - Make sure all TTL is 1800 for all three rows
- Set the “@” IP Address/URL to
That’s it. After a few minutes, daattali.github.io redirected to deanattali.com, which showed my site :)
 Changing the DNS settings on Namecheap
Fun fact: I also bought daattali.com because I’m extremely undecisive and couldn’t decide which domain name I would want to use. :)
Adding an RSS feed
Until a month ago, I really didn’t know much about RSS. This experience taught me how easy and useful RSS feeds are, both as a user and as a writer. I just had to add a simple feed XML file and link to it in the website’s <head> (look at the source code of any page on my site to see it), and an RSS reader can pick it up automatically. The feed is generated by Jekyll using a template, you can look at the source code for my feed and use exactly the same one if you also have a Jekyll site. The main reason I actually wanted to include an RSS feed was because R bloggers needs you to provide a feed in order to use your blog as content on their site.
Adding Google Custom Search + Sitemap
Update 2020: I removed Google Search from my site since it wasn’t being used much
Another thing I learned is how easy it is to integrate Google’s search powers into your own site, like so. After signing up to Google Custom Search, users can now search for any text within my website. To set it up, go to google.com/cse, set up the basic information about your site, and copy the code that Google gives you into your search page.
It can be beneficial to add a sitemap to your site so that Google will know exactly what pages to look at. I used a sitemap from this blog, where the author describes how to add a Jekyll-generated sitemap and how to use it. This will tell Google what pages to index and how often.
Final notes on Jekyll
While this site is built with Jekyll, I chose to (at least for now) keep it simple and let GitHub Pages compile Jekyll for me instead of installing and running it locally. I was on the fence about this because GitHub Pages does not support any custom plugins and there is one plugin I really want to write (and also you just have much more power and flexibility if you run Jekyll yourself), but I decided to let simplicity win this battle, with the benefit of being able to quickly update my site easily from any computer. The plugin I wanted to add is a way to recognize whether or not a given file path is internal to the site or an absolute URL. It would just make some of the templates less verbose and simpler if I could do that, but for now basic Jekyll’ll do. Jekyll will = Jekyll’ll, right? I think I just found today’s weirdest word…